83 Jean St, Grange QLD 4051
Mon-Fri 07:30 AM - 04:00 PM - Sat - 8:00 - 12 - Sunday Closed

Before you even think about calling an electrician, taking a few minutes to scope out your own property can save you a world of headaches and unexpected costs. Getting your home ready for an EV charger isn’t rocket science, but a little prep work goes a long way.
Think of it as a quick self-assessment. By understanding your parking setup and taking a peek at your electrical system, you’ll have a much clearer picture of what the job involves. This means you can give us, or any electrician, the right info for a more accurate quote and a much smoother installation day.
Getting your property ready for an installation ev charger is all about looking at two key areas: the physical spot where the charger will live, and the electrical switchboard that will power it.
Picking a location for your charger is more than just finding a bit of empty wall. It needs to be practical for the daily grind of plugging and unplugging your car.
First up, where do you park, and where is the charging port on your EV? Some are at the front, some on the side, some at the back. You need the charger’s cable to reach the port easily without being stretched tight or becoming a trip hazard for the family.
Here’s what to keep in mind when scouting for a location:
Alright, now for the most important part: a look at your home’s electrical heart—the switchboard. This box is the gatekeeper for all the power in your home, and an EV charger places a significant, sustained demand on it. A quick look inside can tell you if you’re good to go or if an upgrade is on the cards.
Key Takeaway: Your switchboard’s condition is the single most important factor determining the complexity and cost of your EV charger installation. An older, maxed-out board will almost certainly require an upgrade.
Find your switchboard—it’s usually in the garage, a laundry room, or on an outside wall. Open it up. Does it look like there’s no room to move, with every slot filled? Are you looking at old-school ceramic fuses instead of modern circuit breakers? These are dead giveaways that you’ll likely need a switchboard upgrade before anything else. For a more detailed look at what makes a modern board, checking out a guide on the electric switchboard for home can give you some great background info.
Another crucial piece of the puzzle is your power supply. The vast majority of homes in Queensland run on single-phase power. This is perfectly fine for a standard 7kW charger, which is what most homeowners install. However, some larger or more modern properties have three-phase power, which opens the door to much faster 22kW chargers.
A simple way to check is to look at your main switch at the switchboard. A single, standard-width switch usually means single-phase. A much wider switch that looks like three switches fused together is a strong indicator of three-phase power. Knowing this from the get-go helps manage your expectations for potential charging speeds.
Once you’ve got the green light on your home’s electrical capacity, it’s time for the fun part: picking the actual charger. The market is full of options, but finding the right one really comes down to a simple formula: what your car can handle, your daily driving routine, and your home’s power setup. It’s all about finding that perfect match to make charging effortless.
For almost every homeowner, the conversation starts and ends with a Level 2 AC charger. These units are the absolute sweet spot for home use. They give you a massive speed boost over the basic trickle charger that came with your car, without getting into the industrial-grade power and cost of a DC fast charger.
This flowchart gives you a quick visual of how the key pieces of the puzzle fit together.
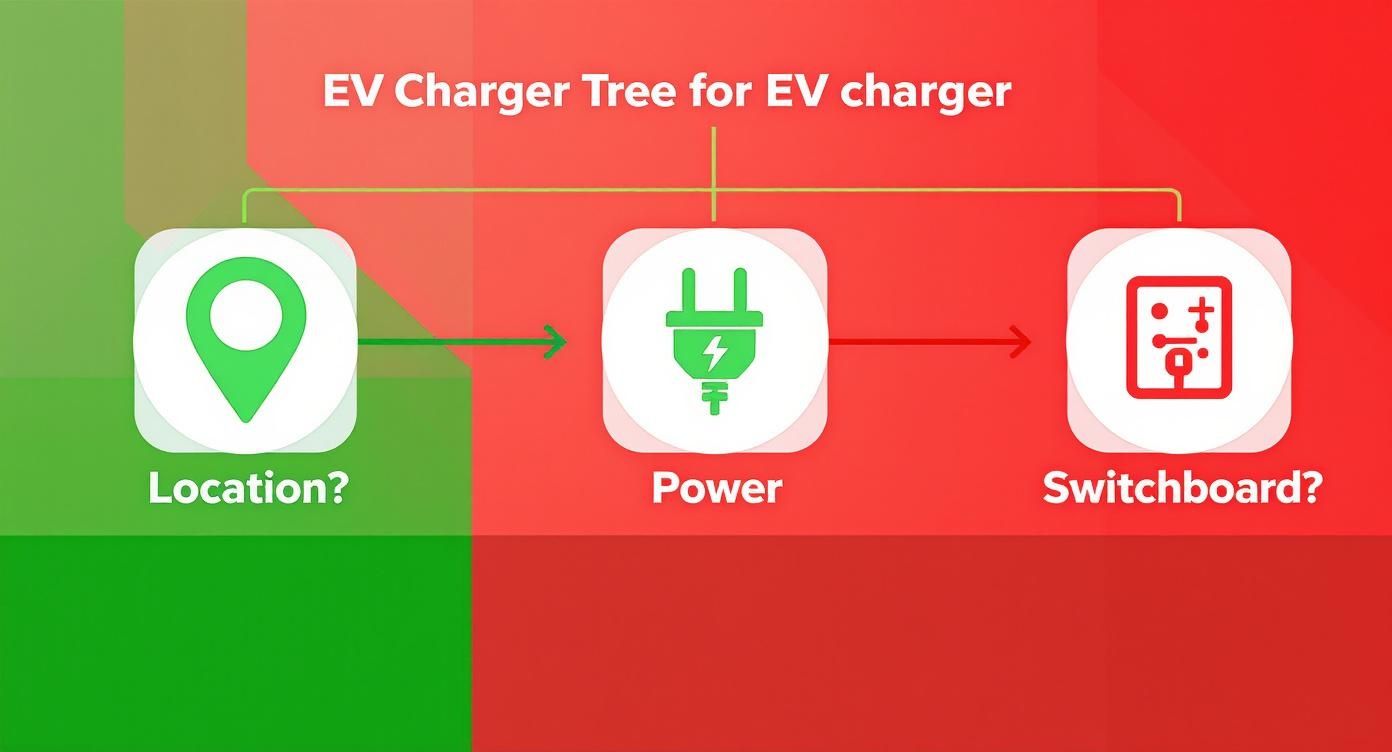
As you can see, the physical location, your available power, and the state of your switchboard are the three pillars of a solid installation plan.
When you dive into the world of Level 2 chargers, the main difference you’ll see is the power output, which is measured in kilowatts (kW). For homes, this usually boils down to two choices: 7kW or 22kW.
A 7kW charger is the standard for most Queensland homes running on a single-phase power supply. Think of it as a reliable workhorse. It can add roughly 40-50 kilometres of range for every hour it’s plugged in. For the average daily commute, that means you can easily get a full charge overnight. You’ll wake up with a “full tank” every single morning, no stress.
On the other hand, a 22kW charger needs a three-phase power supply, which is much less common in residential properties. These things are seriously quick, delivering up to 120-130 kilometres of range per hour. While that speed sounds amazing, it’s often total overkill for overnight charging at home unless you’re driving huge distances every day in an EV with a massive battery.
Our Pro Tip: Don’t pay for power your car can’t actually use. Many popular EVs have an onboard AC charger limited to 11kW. This means even if you install a 22kW unit, the car itself will cap the intake at 11kW, so you’re not getting the full benefit of the more powerful—and more expensive—hardware.
The charger you need is often tied to the specific car you drive. It pays to be familiar with the best electric vehicles on the market, as their battery sizes and charging capabilities will directly influence your choice.
Beyond just the raw power output, modern chargers come packed with features that can genuinely improve your experience and lower your running costs.
Smart Charging: This is, without a doubt, the most valuable feature to look for. A “smart” charger connects to an app on your phone via WiFi, unlocking some seriously useful functions:
Tethered vs. Untethered: This is a classic convenience vs. flexibility debate.
To make it even clearer, here’s a quick table breaking down how a standard 7kW charger stacks up against a powerful 22kW unit for home use.
| Feature | Single-Phase Charger (7kW) | Three-Phase Charger (22kW) |
|---|---|---|
| Power Supply | Standard single-phase (found in most homes) | Requires three-phase power (less common in homes) |
| Charging Speed | Approx. 40-50 km of range per hour | Up to 130 km of range per hour (car-dependent) |
| Best For | Perfect for overnight charging for typical daily commutes. | Households with multiple EVs or drivers with very high daily mileage. |
| Installation Cost | Generally lower due to simpler wiring. | Typically higher due to more complex electrical work. |
| Vehicle Compatibility | Compatible with virtually every EV on the market. | Only gives a real benefit to EVs with high AC charging capacity (11kW+). |
At the end of the day, picking the right hardware is a balancing act. For the vast majority of homeowners in Queensland, a smart, tethered 7kW charger hits that perfect sweet spot of speed, convenience, and cost-effectiveness. It’s the key to a seamless, simple EV ownership experience.
Installing an EV charger is more than just a technical job—it’s a regulated one. Here in Queensland, we have specific rules to make sure every installation is safe, reliable, and won’t cause you headaches with your insurance or home safety down the track.
The most important rule is simple: this is not a DIY project. Under Queensland law, any fixed electrical work, including the installation of an EV charger, must be handled by a Licensed Electrical Contractor. This isn’t just bureaucratic red tape; it’s a critical safety net that ensures your system is installed to strict Australian Standards.
Once we’ve finished the installation, we are legally required to provide you with a Certificate of Electrical Safety (CES). This document is your official proof that the work was completed by a licensed professional and meets all the necessary safety standards.
Think of it as the final sign-off that the job was done right. You’ll need it for your own records, and your home insurer will almost certainly ask for it. Never consider an installation complete until you have this certificate in hand.
A Certificate of Electrical Safety is more than just a piece of paper. It’s your guarantee that the high-voltage connection in your home is safe for you, your family, and your expensive new EV.
In Queensland, electricians work under a strict set of guidelines laid out by the Electrical Safety Office (ESO) and local energy distributors like Energex. These rules dictate exactly how an EV charger must be wired into your home.
Here are the core requirements your electrician will be sorting out for you:
These technical details are exactly why you need a professional. We’re trained to navigate the complex rules that govern safe electrical work. To get a better feel for the foundational rules, you can learn more about the electrical wiring standards Australia follows for all domestic jobs.
For most standard home installations—where the charger is simply mounted to a wall in a garage or carport—you typically won’t need a permit from your local council. The work is covered by the electrical safety regulations and the CES issued by your electrician.
However, things can get a bit more complicated if your installation is less straightforward or you live in a shared property. You might need to look into council or body corporate approval if:
In these situations, your first port of call should always be your body corporate or strata manager. They’ll have their own rulebook and approval process you’ll need to follow before any work can start. A good electrician can usually give you some solid advice on how to handle these conversations.
Let’s talk dollars and cents. Getting a handle on the real cost of installing an EV charger is the first step to budgeting properly and making sure there are no nasty surprises down the track. The total investment really boils down to two things: the price of the charger unit itself and the cost of getting a professional to install it. Both can swing wildly depending on what you choose and your home’s existing electrical setup.
First up, you’ve got the charger itself. The market for Level 2 home chargers is pretty broad these days, with hardware prices typically falling somewhere between $800 and $2,500.
So, what’s behind that price gap? It really comes down to features and brand reputation.
For a deeper dive into how these factors stack up, check out our complete guide on EV charger installation costs.
This is where the numbers can really start to vary. When a licensed electrician quotes you for an installation, you’re not just paying for their time. You’re paying for their expertise, safety compliance, and all the necessary gear like cabling, conduits, and safety switches.
Most sparkies will quote a “standard installation” as a baseline. This usually assumes the charger is going inside a garage, on the same wall as a modern, compliant switchboard that has plenty of spare circuits. In a perfect world like this, the job is straightforward and doesn’t take long.
But let’s be honest, not many homes fit that perfect mould. A few common curveballs can add complexity and, you guessed it, cost.
The single biggest factor that dictates your installation cost is the distance and difficulty of running the cable from your switchboard to your car’s parking spot. A long or tricky run means more materials and a lot more labour.
It pays to know what might nudge your project beyond that “standard” price tag.
Switchboard Upgrades: This is the most common—and significant—extra cost we see. If your switchboard is ancient, still has old ceramic fuses, or is already jam-packed, it will need an upgrade to handle the sustained power draw of an EV charger. In some cases, a big chunk of your installation cost can come from these upgrades. To get a better idea, it’s worth understanding the average cost of an electrical panel upgrade so you can budget for it.
Complex Cable Runs: The installation bill will climb if the cable needs to:
Location and Mounting: Bolting a charger to a brick wall is simple. But if it needs to be mounted on a freestanding pedestal in a carport or requires custom brackets, the extra materials and labour will add up.
To paint a clearer picture, here is a quick overview of what to expect in terms of costs.
Estimated Cost Breakdown for Home EV Charger Installation
| Cost Component | Typical Price Range (AUD) | Notes |
|---|---|---|
| Charger Hardware (Unit Only) | $800 – $2,500+ | Varies based on brand, smart features (Wi-Fi, solar integration), and power output. |
| Standard Installation | $700 – $1,200 | Assumes the charger is close to a modern switchboard with spare capacity. |
| Complex Installation | $1,500 – $3,000+ | Involves long cable runs, trenching, or navigating difficult access points. |
| Switchboard Upgrade | $800 – $2,500+ | Required for older homes or boards without capacity. Can be a significant extra cost. |
This table should give you a realistic baseline for what your project might involve.
Let’s look at a couple of real-world scenarios to see how this plays out.
Scenario A: The Simple Garage Install
Scenario B: The Complex Carport Install
By understanding these different pieces of the puzzle, you can have a much more productive chat with your electrician and know exactly what you’re looking at when the quotes come in.
After all the planning and paperwork, installation day is when it all comes together. Knowing what the day will look like helps make the whole process feel straightforward and stress-free. When a licensed electrician from DLG Electrical arrives, you can expect a professional, organised process from the moment we pull up.

The first thing we’ll do is walk through the job with you one last time. This is a simple but crucial step to make sure we’re all on the same page before a single tool comes out of the van.
We’ll confirm the exact mounting location for your charger, double-check the planned cable route from the switchboard, and give you a clear rundown of the day’s work. This is the perfect time to ask any final questions you might have.
Once you give us the green light, the core of the installation ev charger work gets underway. It’s a precise, multi-step process that we handle with care, always starting by switching off your home’s main power for safety.
Here’s what’s involved:
A good sparky always works cleanly and respects your property. At DLG Electrical, we make it a point to leave our workspace tidier than we found it, causing minimal disruption to your home.
With the physical installation done, the final phase is all about testing and education. This is where we ensure everything is working perfectly and you feel 100% confident using your new charger.
We’ll power everything back on and perform a series of critical tests using specialised equipment. This confirms the charger is getting the correct voltage, all safety mechanisms are active, and that it’s communicating properly with your EV. Then comes the real test: we’ll plug in your vehicle to make sure it starts charging exactly as it should.
The job isn’t done until you’ve had a full demonstration. Your electrician will walk you through:
Most importantly, we will issue your Certificate of Electrical Safety. This document is your official proof that the installation was done by a licensed professional and complies with all Australian standards. Keep it in a safe place, as you’ll need it for insurance and your own records.
With the handover complete, you’re officially ready to enjoy the incredible convenience of charging at home.
Even with a solid plan, it’s natural to have a few last-minute questions before you give the green light. Getting clear answers to these common queries helps build confidence and ensures there are no surprises on installation day. Here are the things we get asked most often by Queensland homeowners.
For a straightforward job, we’re usually in and out in about two to four hours. This covers a standard installation where we’re mounting the charger in a garage, nice and close to a modern switchboard that has plenty of space.
But sometimes, things get a bit more involved. If we need to run a long cable from one side of the house to the other, dig a trench for underground wiring, or carry out a full switchboard upgrade, it can easily turn into a full-day job. Occasionally, a second visit might be needed for more complex scenarios.
In a word: no. Under Australian law, it’s illegal and incredibly dangerous for anyone other than a Licensed Electrical Contractor to perform this kind of fixed electrical work. An EV charger isn’t just another appliance; it’s a high-power unit that needs its own dedicated circuit and specific safety gear.
Trying to DIY it isn’t worth the risk. You’re looking at potential electric shock, fire, and serious damage to your car. On top of that, without a Certificate of Electrical Safety from a licensed sparky, your home insurance could be voided if anything goes wrong.
Yes, your electricity bill will increase, but it will almost certainly be less than what you were forking out for petrol. The exact amount comes down to three things: how many k’s you drive, your EV’s efficiency, and your electricity tariff.
This is where a smart charger really proves its worth. By scheduling charging for off-peak hours—usually overnight when the rates are lowest—you can seriously soften the blow to your bill. Most drivers find the cost of charging at home is just a fraction of what they used to pay at the bowser.
Real-World Savings: Many EV owners tell us they’re saving 50-70% on their “fuel” costs after switching from petrol. The key is making the most of off-peak rates or their own solar power.
This is a really common question, but the answer is no, you don’t. While Tesla sells its own branded “Wall Connector,” every Tesla sold in Australia uses the standard Type 2 charging port. That means your car is compatible with any Level 2 EV charger from any reputable brand out there.
Your Tesla even comes with an adapter just for this purpose. This gives you the freedom to pick a charger based on the features you actually want—like solar integration or a different look—without being locked into a single brand. You can choose the best bit of kit for your home and budget, knowing it will work perfectly with your car.
Ready to get a clear, no-obligation quote for your EV charger installation? The team at DLG Electrical is here to provide expert advice and professional service to ensure your installation is safe, compliant, and perfectly suited to your home. Contact us today to discuss your project.

Master Electrician with over 30 years of experience. Founded DLG Electrical in 2005 after international project work including electrical installations at Stamford Bridge Stadium, London(Home of Chelsea FC).

Local Electricians that can fix all Electric Hot water Systems.
Motion sensor lights are a versatile addition to any home, offering nu
