83 Jean St, Grange QLD 4051
Mon-Fri 07:30 AM - 04:00 PM - Sat - 8:00 - 12 - Sunday Closed

A successful EV charger installation begins long before an electrician shows up. It starts with smart planning. This initial phase is all about matching your real-world needs with the right equipment and making sure your property is ready for it. Getting this right from the start saves you from unexpected costs and frustrating delays later on.
Jumping into a home EV charger installation requires a bit of homework. Before you even think about picking a unit or booking a sparkie, taking the time to assess your situation will ensure you get a setup that’s efficient, cost-effective, and fits your lifestyle perfectly.
The Australian electric vehicle market is growing at a blistering pace, with a forecasted compound annual growth rate of 21.5%. This is expected to push the market value towards a staggering USD 1,643.1 million. This incredible growth just goes to show how critical well-planned home charging solutions have become.
Let’s break down this planning phase into a few key areas. Each one is crucial, influencing everything from how fast you can charge to your final budget.
First things first, let’s look at your daily driving habits. Are you doing a short 20-30 kilometre commute, or are you regularly clocking over 100 kilometres a day? The answer makes a huge difference.
Someone with a short daily run might find a basic Level 1 charger is perfectly fine for overnight top-ups. On the other hand, if you’re a long-distance driver, you’ll almost certainly need the speed of a Level 2 unit to keep you on the road.
Think about your routine. Do you absolutely need a full battery every single morning, or is a partial charge usually enough to get you through the day? Answering these questions helps you figure out the charging speed you actually need, stopping you from overspending on a system that’s more powerful than necessary.
This infographic clearly shows the financial upside of charging at home versus relying on public networks.

As you can see, the lower cost per kilowatt-hour at home translates directly into big monthly savings. It makes the initial installation a very wise long-term investment.
Getting your head around the different charger levels is the next big step. Each one offers a different mix of speed, cost, and electrical grunt.
To help you decide, here’s a quick rundown of the main charger types available for home and business use.
| Charger Level | Charging Speed (km/hour) | Voltage Required | Best Use Case |
|---|---|---|---|
| Level 1 | 10-20 km/hr | Standard 240V | Plug-in hybrids, EVs with small batteries, low daily mileage. |
| Level 2 | 40-60 km/hr | Dedicated 240V Circuit | Most home and business installs, full EVs, daily drivers. |
| DC Fast Charger | 300+ km/hr | 400V+ 3-Phase | Public stations, commercial fleets, motorway service centres. |
As the table shows, there’s a clear winner for most residential scenarios.
For most homeowners, a Level 2 charger hits that perfect sweet spot between performance and affordability. It’s fast enough to give you a full charge overnight without the extreme cost and electrical demands of a DC fast charger.
To get a better handle on the numbers, check out our detailed guide on EV charger installation costs in Australia.
The last, and arguably most important, piece of the planning puzzle is taking a hard look at your home’s current electrical capacity. A Level 2 charger pulls a lot of power, and not all homes are ready to handle it straight out of the box.
Before you even think about buying a charger, get a licensed electrician to inspect your switchboard. They’re the only ones who can tell you if your existing panel has enough capacity and physical space for a new dedicated circuit. If your switchboard is old or already full, it will need an upgrade—and that’s something you need to factor into your budget from day one.
This professional assessment is non-negotiable. It ensures your installation is safe, compliant with Australian standards, and won’t lead to annoying issues like tripped breakers or overloaded circuits down the track. Planning for a potential switchboard upgrade right from the start is the best way to avoid a costly surprise on installation day.
Once you’ve figured out your charging needs, it’s time to shift focus to the technical side of things. Getting your property ready for an EV charger is a critical step, and a little bit of preparation here goes a long way towards a smooth, safe, and cost-effective installation. This isn’t just about picking a spot on the wall; it’s about making sure your home’s electrical system is actually up for the job.
The boom in EV ownership is precisely why this prep work is so important. Recently, electric vehicle sales in Australia have skyrocketed, hitting nearly 16% of new vehicle sales in a single month. This surge means more and more households are looking for charging solutions, putting a much bigger demand on our existing residential electrical systems.
A licensed electrician is your best guide through this process, but if you understand what they’re looking for, you can have a much more productive conversation and avoid any nasty surprises down the track.
The first place any good electrician will look is your switchboard. It’s the heart of your home’s electrical system, responsible for safely distributing power everywhere. Adding a high-draw appliance like an EV charger is a significant new load that it needs to manage.
Your electrician will perform what’s called a “load calculation.” They’ll tally up the total potential power usage of your home—everything from the air con to the oven—to see if there’s enough capacity left to safely run the charger without overloading the system.
There are a few tell-tale signs that your switchboard might need some attention:
If an upgrade is necessary, think of it as a crucial investment in your home’s safety. To get a better idea of the factors involved, check out our guide on what to expect with an electrical switchboard upgrade cost. This work doesn’t just enable your new charger; it seriously improves the overall electrical safety of your entire property.
Let’s be clear: you can’t just plug a powerful Level 2 charger into any old power point and hope for the best. A dedicated circuit is non-negotiable for a safe and efficient installation. This means a brand new, separate cable is run directly from your switchboard right to the spot where your charger will be.
This dedicated connection does a couple of vital things. First, it guarantees the charger gets a consistent, stable supply of power, which stops annoying issues like tripped breakers that would happen if it had to share a circuit with other appliances. Second, it’s a fundamental safety requirement under Australian electrical standards (AS/NZS 3000).
A dedicated circuit is like giving your EV charger its own private lane on the electrical highway. It prevents traffic jams (overloads) and ensures a smooth, fast journey for the energy flowing to your car, without interfering with the rest of your home’s appliances.
The amperage of this circuit directly dictates your charging speed. A 16A circuit can deliver around 3.6kW of power, while stepping up to a 32A circuit pushes that to 7.2kW, effectively cutting your charging time in half. Your electrician will help you decide which is the right fit based on your charger, your car, and your switchboard’s capacity.
Finally, getting your property ready means putting the right safety measures in place and picking the best location. Every single EV charger circuit must be protected by a Residual Current Device (RCD), also known as a safety switch. This is a life-saving device designed to instantly shut off the power if it detects an electrical fault, protecting you and your family from electric shock.
Beyond the switchboard, you need to think about the physical location. A garage is usually the easiest spot, as it’s often close to the switchboard and sheltered from the weather. But outdoor installations are perfectly fine and very common too.
For an outdoor unit, your electrician will need to:
Thinking through these details beforehand—from the health of your switchboard to the charger’s final home—makes the whole process much smoother. It turns your EV charger project from a potential headache into a straightforward, valuable upgrade for your home.
Knowing what actually happens on installation day can take a lot of the stress out of the process. When your licensed electrician turns up, they won’t just start drilling holes. The first thing they’ll do is a final walkthrough with you to confirm the plan you’ve already discussed, making sure the day goes off without a hitch.
This is your chance to ask any last-minute questions and lock in the exact placement of the charger and the cable route. A good sparky will always take the time to make sure you’re both on the same page before they even open their toolbox. It’s this collaborative start that really sets the tone for a professional and tidy job.
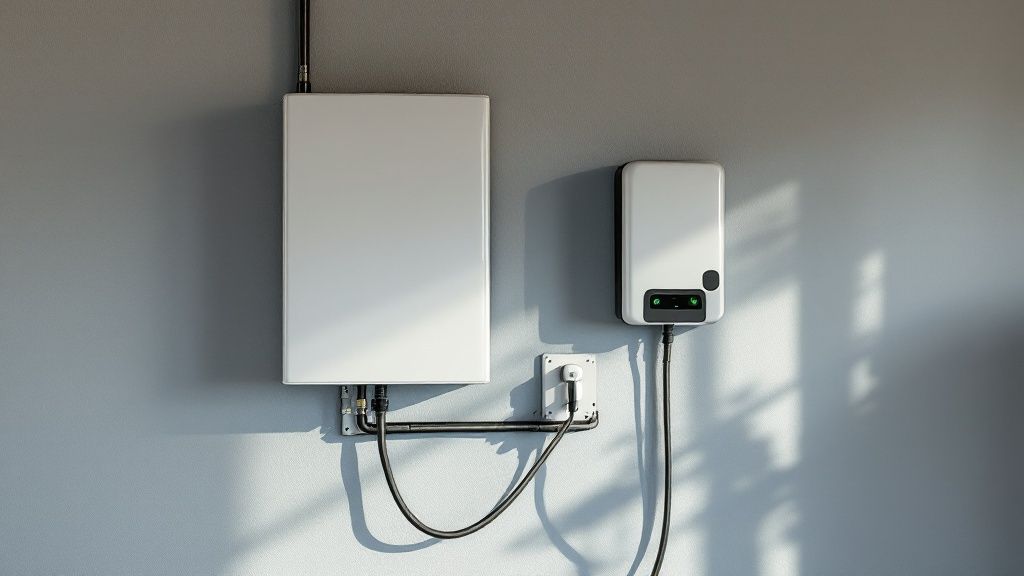
As soon as they arrive, the first priority is always safety. Before any real work kicks off, the electrician will head to your switchboard and shut off the main circuit breaker. This is a non-negotiable step that de-energises the entire electrical system, making it completely safe to work on.
They’ll then run a few tests on your existing wiring to verify it’s safe and up to code. This isn’t just a formality; it’s a critical part of their professional duty to ensure the safety of your property and their team during the install.
Once the site is confirmed safe, they’ll lay down drop sheets and protective coverings in the work areas. It’s a simple touch, but this kind of attention to detail is often the hallmark of a true professional who respects your home.
With the safety checks ticked off, the physical installation can begin. The electrician will securely fix the EV charger unit to the wall at the height you agreed on—typically between 0.6 and 1.2 metres from the ground to meet Australian standards.
This involves more than just a couple of screws. For a brick or concrete wall, they’ll use heavy-duty masonry anchors to make sure the unit is rock-solid. If it’s going onto a plasterboard wall, they’ll find the internal studs and fix the charger directly to them for maximum support.
A properly mounted charger isn’t just about how it looks; it’s about long-term reliability. The unit has to be perfectly level and solidly attached to handle the daily plugging and unplugging of that heavy charging cable for years to come.
Next up is what’s often the most time-consuming part of the job: running the dedicated armoured cable from your switchboard to the charger’s location. A straightforward installation might take 2 to 4 hours, but this can easily stretch out depending on how complex the cable run is.
The electrician will figure out the most efficient and least intrusive path. This could mean running the cable:
Drilling through walls, particularly double brick, takes real skill and the right gear to get a clean exit point without making a mess. A professional will always seal any penetrations afterwards to maintain your home’s weatherproofing.
With the cable in place, the electrician gets to the most technical part of the install. They’ll connect one end of the new cable to the EV charger itself, making sure every terminal is tightened to the correct torque specifications.
The other end is then wired into the switchboard. This involves installing a new dedicated circuit breaker and a Type A RCD (safety switch) to protect the new circuit. This is a critical safety measure that ensures your system complies with the latest Australian electrical standards.
Once everything is connected, the job isn’t done. A rigorous testing process comes next. The electrician will restore power and conduct a series of commissioning tests to confirm the charger is working correctly and safely.
These checks almost always include:
Finally, the electrician will clean up the work area, provide you with the electrical safety certificate, and give you a full handover. They’ll walk you through how to use your new charger, explain any smart features, and answer any lingering questions. This ensures you’re left with a safe, compliant, and fully functioning installation.
Not every EV charger goes into a spacious suburban garage with a brand-new switchboard. Far from it. In the real world, we see all sorts of hurdles that can make a personal charger feel like an impossible dream. From tricky apartment block politics to the unique power challenges of rural properties, let’s tackle these complex situations head-on.
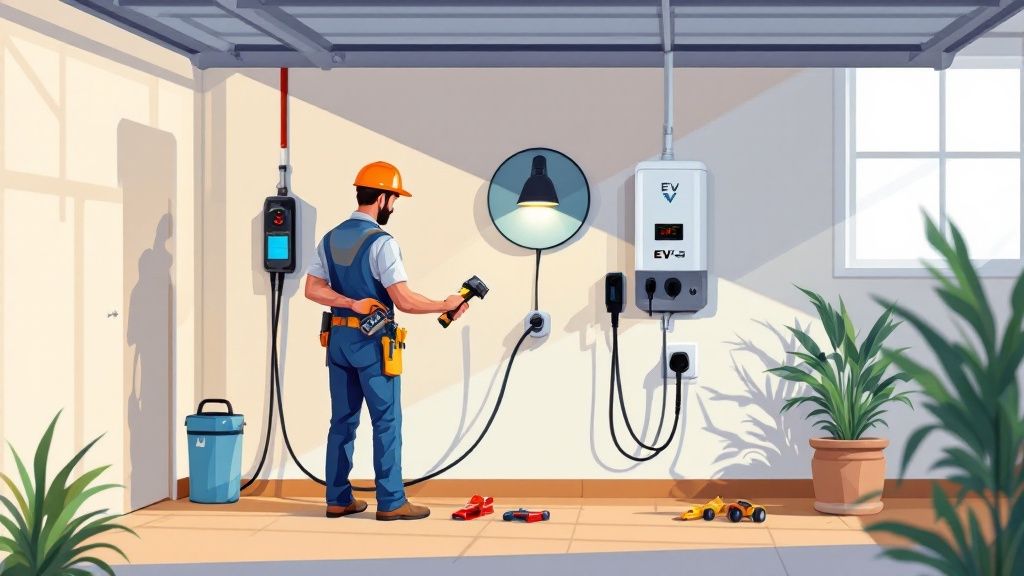
These aren’t just edge cases; they’re a huge part of Australia’s EV transition. While around 80% of EV owners love the convenience of charging at home, there are still major infrastructure gaps. This is especially true for the 10% of Australians living in apartments, who often face a maze of approvals and technical roadblocks.
But with the right strategy, most of these roadblocks can be turned into manageable steps.
Installing an EV charger in a multi-unit building is often less about the electrical work and more about people, planning, and communication. Your body corporate or strata management has a duty to look after shared infrastructure, and a new, high-power electrical installation is a pretty serious item on their agenda.
To get them on board, you need to think like a project manager. Don’t just fire off a quick email asking for permission—you need to build a rock-solid case.
A professional proposal is your best tool. It should include:
“When approaching a body corporate, focus on presenting solutions, not just requests. A professional plan that outlines how power will be managed and billed demonstrates that you’ve considered the impact on all residents, making approval far more likely.”
Anticipate their questions. They almost always boil down to two things: who pays for the power, and can the building’s main supply even handle it? A charger connected to its own sub-meter solves the first problem instantly. A proper load assessment from your sparky handles the second.
For apartment dwellers, navigating the approval process is often the biggest hurdle. The table below breaks down the typical steps you’ll need to follow to get your charger installed smoothly.
| Step | Action Required | Key Considerations |
|---|---|---|
| 1. Initial Research | Review your strata bylaws and rules regarding common property modifications. | Some buildings already have EV charging policies in place. Check first. |
| 2. Engage an Electrician | Get a qualified electrician to conduct a site assessment and provide a detailed quote. | The quote should include a load management plan and insurance certificates. |
| 3. Prepare Your Proposal | Draft a formal proposal for the strata committee or body corporate. | Include the quote, plan, insurance, and details on how electricity usage will be billed. |
| 4. Submit for Approval | Formally submit your proposal and request permission to proceed. | Be prepared to attend a strata meeting to answer questions. |
| 5. Await Decision | The committee will review the proposal and vote. This can take time. | Follow up politely if you don’t hear back within the expected timeframe. |
| 6. Schedule Installation | Once approved, coordinate the installation date with your electrician and building manager. | Ensure they are aware of any potential disruptions, like temporary power outages. |
| 7. Final Inspection | Your electrician will complete the installation, testing, and provide a certificate of compliance. | Provide a copy of the compliance certificate to your strata manager for their records. |
Following these steps methodically shows the committee you’re responsible and have thought through all the implications, making a ‘yes’ much more likely.
If you live out of town, your challenges are completely different. Grid stability can be a real issue, and your property might be fed by older, less robust power lines. Just plugging in a standard EV charger could cause voltage drops or strain the local network, especially during peak times.
For rural properties, the key is a smart charger with load management capabilities. This technology is a total game-changer.
Here’s how it works:
This intelligent balancing act prevents overloads before they happen, ensuring your charger works in perfect harmony with your home without ever tripping a breaker. It’s the smartest way to get fast, reliable charging on a grid that might not have the muscle of its urban counterparts. For homes with particularly high power needs or plans for future expansion, it might also be worth exploring the benefits of a three-phase power installation to give you more stable and robust capacity.
https://www.youtube.com/embed/tujruyZ00pE
With your new EV charger mounted and wired up, you might think the job’s done. But the final stage is arguably the most critical for your safety and peace of mind: commissioning. This is where your electrician runs a series of crucial checks before giving you the all-clear.
This isn’t just a quick flick of a switch. It’s a methodical process that verifies every single component is working correctly and safely according to strict Australian standards. Once this is ticked off, you can get to the exciting part—exploring the smart features that make your charger more than just a power outlet.
Before handing over the reins, your electrician will conduct a series of mandatory tests. Think of it as a roadworthy certificate for your new charging setup, ensuring the entire circuit from switchboard to plug is safe, compliant, and ready for daily use.
These vital checks usually involve:
Once everything passes muster, your electrician will issue a Certificate of Compliance (Electrical Safety Certificate). This is your official proof that the installation meets all legal and safety requirements here in Australia.
With the safety checks passed, it’s time to get your charger online. Most modern EV chargers are Wi-Fi enabled, letting you connect them to your home network to unlock a whole suite of powerful features through a smartphone app.
The first step is usually downloading the manufacturer’s app and following the on-screen prompts to pair it with your charger. This is often as simple as scanning a QR code on the unit itself and punching in your Wi-Fi password.
Once connected, the app becomes your command centre. You can monitor charging sessions, track energy consumption, and—most importantly—set up charging schedules that can save you a serious amount of money over time.
“A smart charger isn’t just about convenience; it’s an active tool for managing your household energy costs. By scheduling your charging sessions to align with off-peak electricity tariffs or your solar panel’s peak production hours, you take direct control of when and how you use energy, which is the key to maximising your savings.”
Getting to grips with your charger’s smart capabilities is where you’ll really see a return on your investment. While the features vary between brands, most quality smart chargers offer a core set of functions that give you incredible control over how you refuel your vehicle.
Here are some of the most valuable features to look for:
By taking a bit of time to explore these settings, you turn your charger from a simple appliance into a smart, cost-saving asset for your home.
Deciding to get an EV charger installed is exciting, but it naturally brings up a few questions. To help you feel confident about the process, we’ve pulled together the most common queries we get from customers right here in Australia, with clear, straightforward answers.
This section is all about demystifying the installation, tackling the big concerns around cost, safety, rules, and timing so you know exactly what to expect.
For a standard Level 2 EV charger installation, you’re typically looking at a price range between $750 and $2,000. Of course, several factors will influence where your job falls on that scale.
The biggest variables are the distance from your switchboard to the charger’s location and how complex that cable run is. A simple job inside a garage, right near the electrical panel, is going to be at the lower end of that range.
But if the installation needs more involved work—like digging a trench for an outdoor charger or upgrading your entire switchboard to handle the new load—the cost will climb. The only way to get a firm price is with a professional site assessment.
In Australia, that’s a hard no. It’s illegal and incredibly dangerous to try and install an EV charger yourself unless you’re a fully licensed electrician.
All hardwired electrical work must be done by a qualified professional. This is non-negotiable and ensures your installation meets Australian Standards (AS/NZS 3000), which is critical for your safety.
A DIY installation will instantly void your charger’s warranty and could even invalidate your home insurance policy. Always bring in a licensed professional to make sure the work is safe, compliant, and properly protected.
For most standard home installations—think a charger in a private garage or carport—you won’t need to get council approval. It’s generally considered part of routine electrical work.
The story changes if you live in an apartment, townhouse, or any property managed by a body corporate or strata. In these situations, you will absolutely need their formal approval before any work can start.
It’s always smart to double-check with your electrician, as they’ll be up-to-date with local rules. For strata properties, getting ahead with clear communication and a professional proposal is the key to getting a smooth sign-off.
You might be surprised at how quick a standard, straightforward Level 2 charger installation is. A licensed electrician can usually have the whole job done in just 2 to 4 hours.
That timeframe covers mounting the unit, running a new dedicated circuit from the switchboard, making the final connections, and running all the necessary safety tests.
More complex projects will naturally take longer. If the job involves a full switchboard upgrade, drilling through double-brick walls, or a particularly long or tricky cable run, it could easily turn into a full day’s work. Your electrician will give you a solid time estimate after their site inspection.
Ready to take the next step towards convenient, cost-effective home charging? The team at DLG Electrical is here to help. With over 19 years of experience, our licensed electricians provide safe, compliant, and professional EV charger installations across Brisbane. For a free, no-obligation quote, visit us at https://dlgelectrical.com.au.

Master Electrician with over 30 years of experience. Founded DLG Electrical in 2005 after international project work including electrical installations at Stamford Bridge Stadium, London(Home of Chelsea FC).

Local Electricians that can fix all Electric Hot water Systems.
Motion sensor lights are a versatile addition to any home, offering nu
