83 Jean St, Grange QLD 4051
Mon-Fri 07:30 AM - 04:00 PM - Sat - 8:00 - 12 - Sunday Closed

The kitchen is no longer just a place for cooking; it’s the central hub of the modern Australian home. It’s where we gather, work, and entertain. Yet, its full potential is often unrealised due to poor or outdated lighting. A well-executed lighting plan does more than just illuminate your benchtops; it transforms the atmosphere, improves safety, and adds significant value to your property. Poor lighting can make a beautiful kitchen feel cramped and unwelcoming, while a strategic design can make it feel spacious, functional, and inviting.
This guide moves beyond generic advice to provide a detailed list of kitchen lighting ideas for Australia, tailored for homeowners in Brisbane and beyond. We will explore a complete range of options, from foundational ambient lighting to precision task lighting and eye-catching accent fixtures. You will discover practical ways to implement:
Whether you’re undertaking a full renovation in Grange or simply looking to upgrade your Windsor home’s functionality, this comprehensive list will provide the actionable insights needed to create a kitchen that is both beautiful and brilliantly lit. Let’s explore the ideas that will redefine your home’s most important space.
Recessed LED downlights are a cornerstone of modern kitchen lighting ideas in Australia for good reason. Installed directly into the ceiling cavity, they provide clean, unobtrusive ambient light that covers the entire space. Their real power, however, is unlocked when paired with dimmer controls. This combination allows you to adjust the brightness instantly, shifting from bright, functional light for meal preparation to a soft, warm glow for dining or entertaining.
This flexibility makes them a prime choice for open-plan living areas, a common feature in Brisbane homes. For instance, recent renovation projects in suburbs like Grange and Windsor have used zoned dimmer circuits. This allows homeowners to have bright task lighting over the kitchen island and benchtops while keeping the adjacent dining area softly lit, creating distinct atmospheres within a single, open space.
The primary advantage of LED technology is its remarkable energy efficiency. LED downlights consume up to 80% less power than outdated halogen globes and boast a lifespan of 25,000 to 50,000 hours, significantly reducing both your electricity bills and maintenance frequency. For effective implementation, consider these practical tips:
Expert Insight: Proper circuit design is critical for zoned dimming. A qualified electrician from DLG Electrical can ensure your setup is compliant with Australian electrical codes and that the dimmers are compatible with your chosen LED lights to avoid flickering or buzzing. To discover more about the specifics of LED downlights, our detailed guide offers further information.
Under-cabinet lighting is a non-negotiable element for any truly functional kitchen. By installing LED strips or linear fixtures directly beneath your overhead cabinets, you eliminate the shadows cast by your own body, brightly illuminating the benchtops where all the crucial work happens. This form of task lighting is essential in Australian kitchens for safe and precise food preparation, chopping, and reading recipes, creating a layered and highly practical lighting scheme.
This approach is especially effective for improving functionality without cluttering ceiling space. We’ve seen this implemented beautifully in contemporary kitchens across Brisbane, from Grange to Windsor, where LED strips are discreetly fitted under floating shelves and cabinetry. When coordinated with dimmer-controlled overhead lights, it allows for a seamless transition from a bright, functional workspace to a softly accented, atmospheric kitchen.
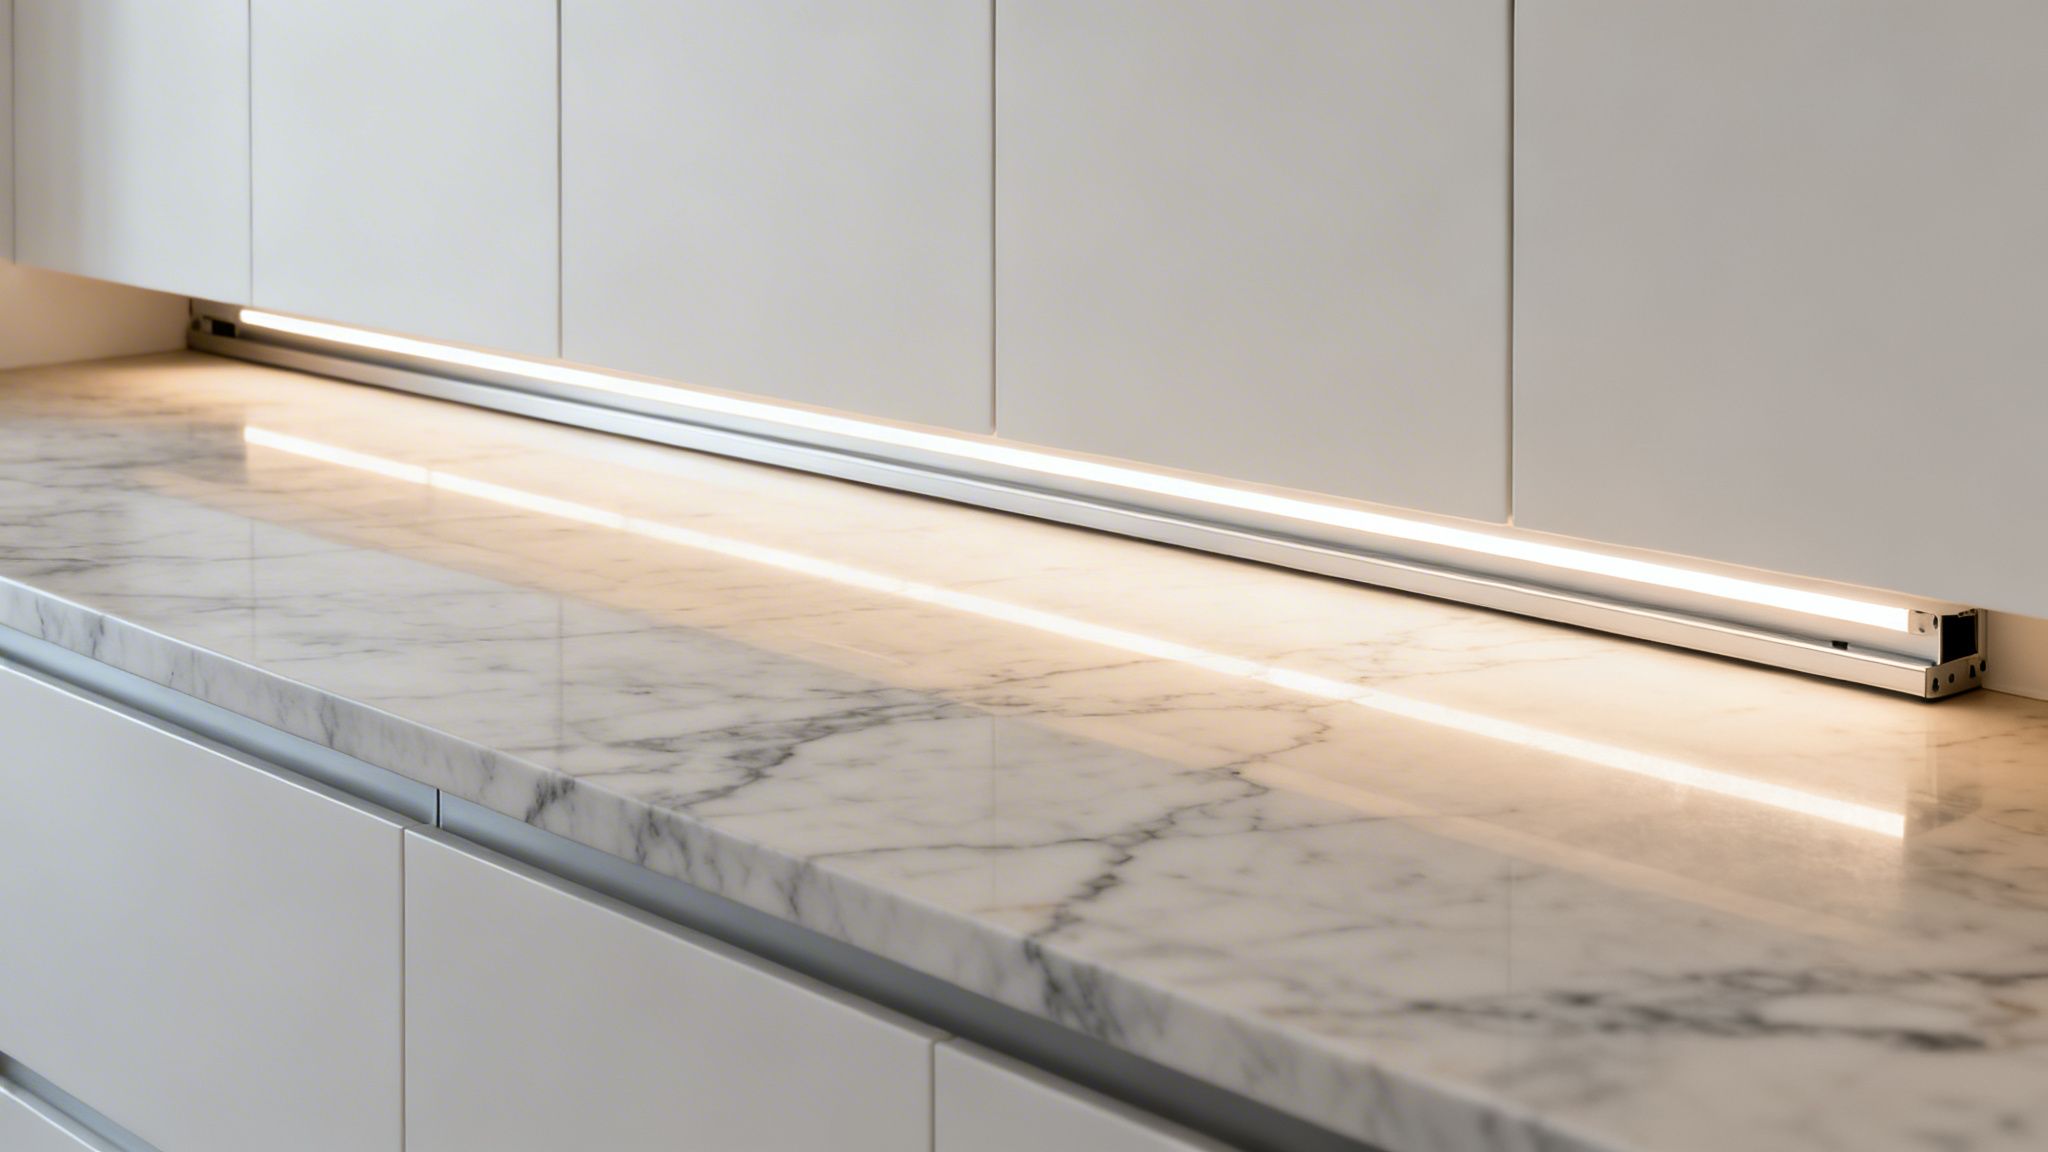
The primary benefit is targeted, shadow-free illumination exactly where you need it most. This not only makes tasks safer but also enhances the visual appeal of your splashback and benchtops. Modern LED strips are energy-efficient, low-profile, and offer incredible versatility. For a professional-grade installation, consider these tips:
Expert Insight: For a polished finish, power supplies and wiring must be properly concealed, often within the cabinetry or wall cavities. This requires careful planning and professional installation to meet Australian safety standards. Our team can help design and execute a flawless LED lighting installation that integrates perfectly with your kitchen’s design.
Pendant lights are a standout feature in modern Australian kitchens, serving as both powerful task lighting and a stunning design centrepiece. Suspended from the ceiling, these fixtures are most effective when placed over a kitchen island or benchtop, providing focused light for food preparation, dining, and socialising. Their ability to add personality and visual interest makes them one of the most popular kitchen lighting ideas in Australia.
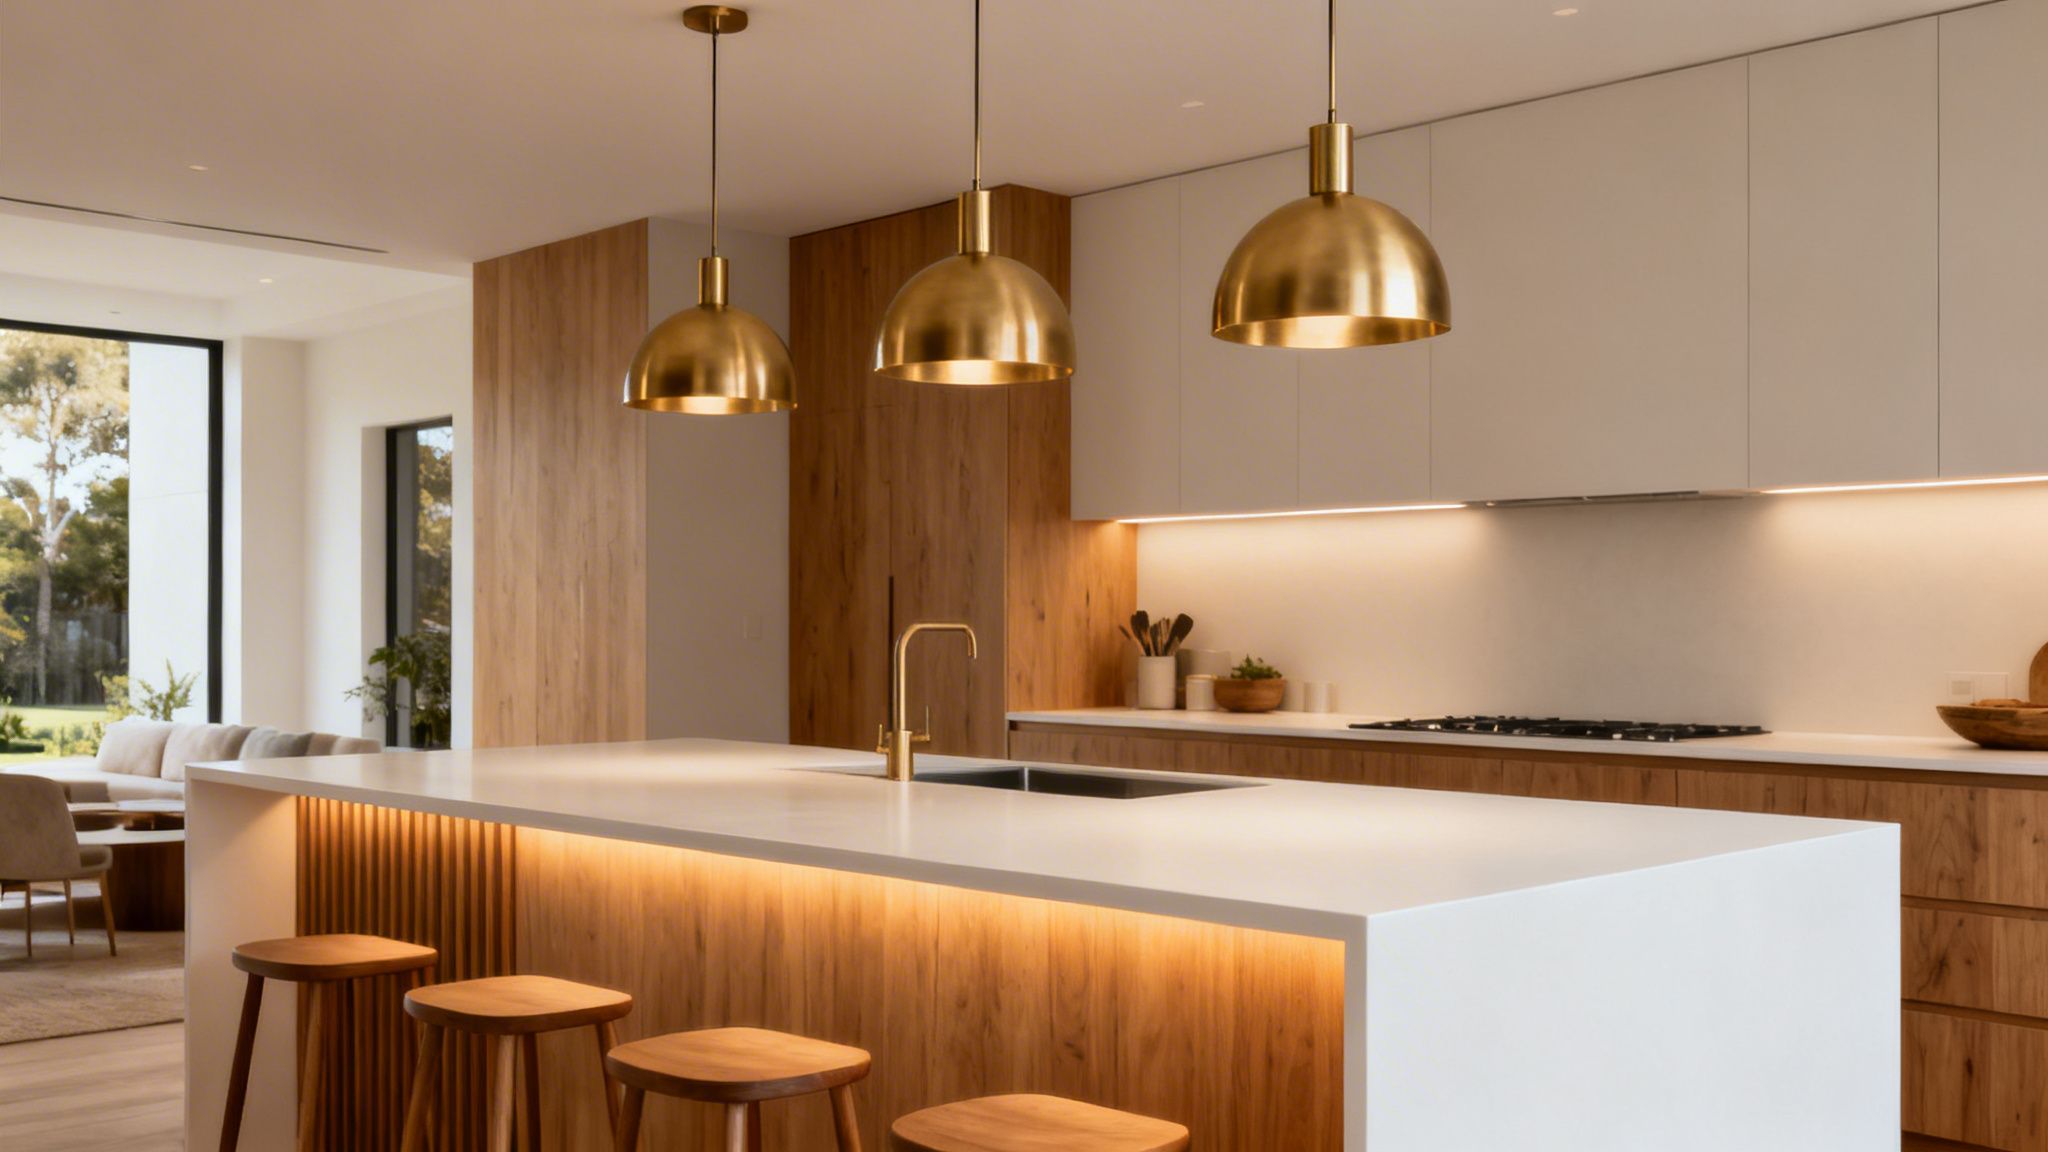
This trend is highly visible across Brisbane, where open-plan living demands that kitchens are both functional and beautiful. In recent North Brisbane renovations, we’ve seen a move towards linear arrangements, such as three elegant brushed brass pendants installed over a 1.5-metre island. Similarly, homes in Windsor and Grange are adopting this style to define the kitchen zone within a larger entertaining space, blending practicality with high-end design.
The main benefit of pendant lights is their dual-purpose nature. They provide direct, glare-free task lighting exactly where you need it, while also acting as a decorative element that can tie an entire design scheme together. From industrial styles to minimalist Scandinavian designs popularised by brands like Muuto, there’s a pendant to suit any aesthetic. For a successful installation, follow these tips:
Expert Insight: Getting the height and spacing of pendant lights right is crucial for both function and aesthetics. It’s also important that the installation is performed safely by a licensed electrician. At DLG Electrical, we ensure all wiring is correctly routed and secured, and that the fixtures are properly supported to handle their weight, guaranteeing a safe and visually perfect result.
Integrated splashback lighting is a stylish and functional kitchen lighting idea popular in contemporary Australian homes. This method involves embedding LED strips within or behind the splashback, typically a glass or tiled surface behind the benchtop. The result is a seamless, ambient glow that not only illuminates the workspace but also turns the splashback itself into a striking design feature, adding visual depth and modern sophistication.
This approach combines practical task lighting with beautiful accent illumination. In modern Brisbane renovations, particularly in suburbs like Grange and Windsor, illuminated glass splashbacks are used to create a high-end, clean aesthetic. Similarly, new builds in North Brisbane are incorporating LED-lit tile splashbacks, highlighting the texture and colour of the tiles while providing a soft, welcoming light perfect for open-plan kitchens during evening entertainment.
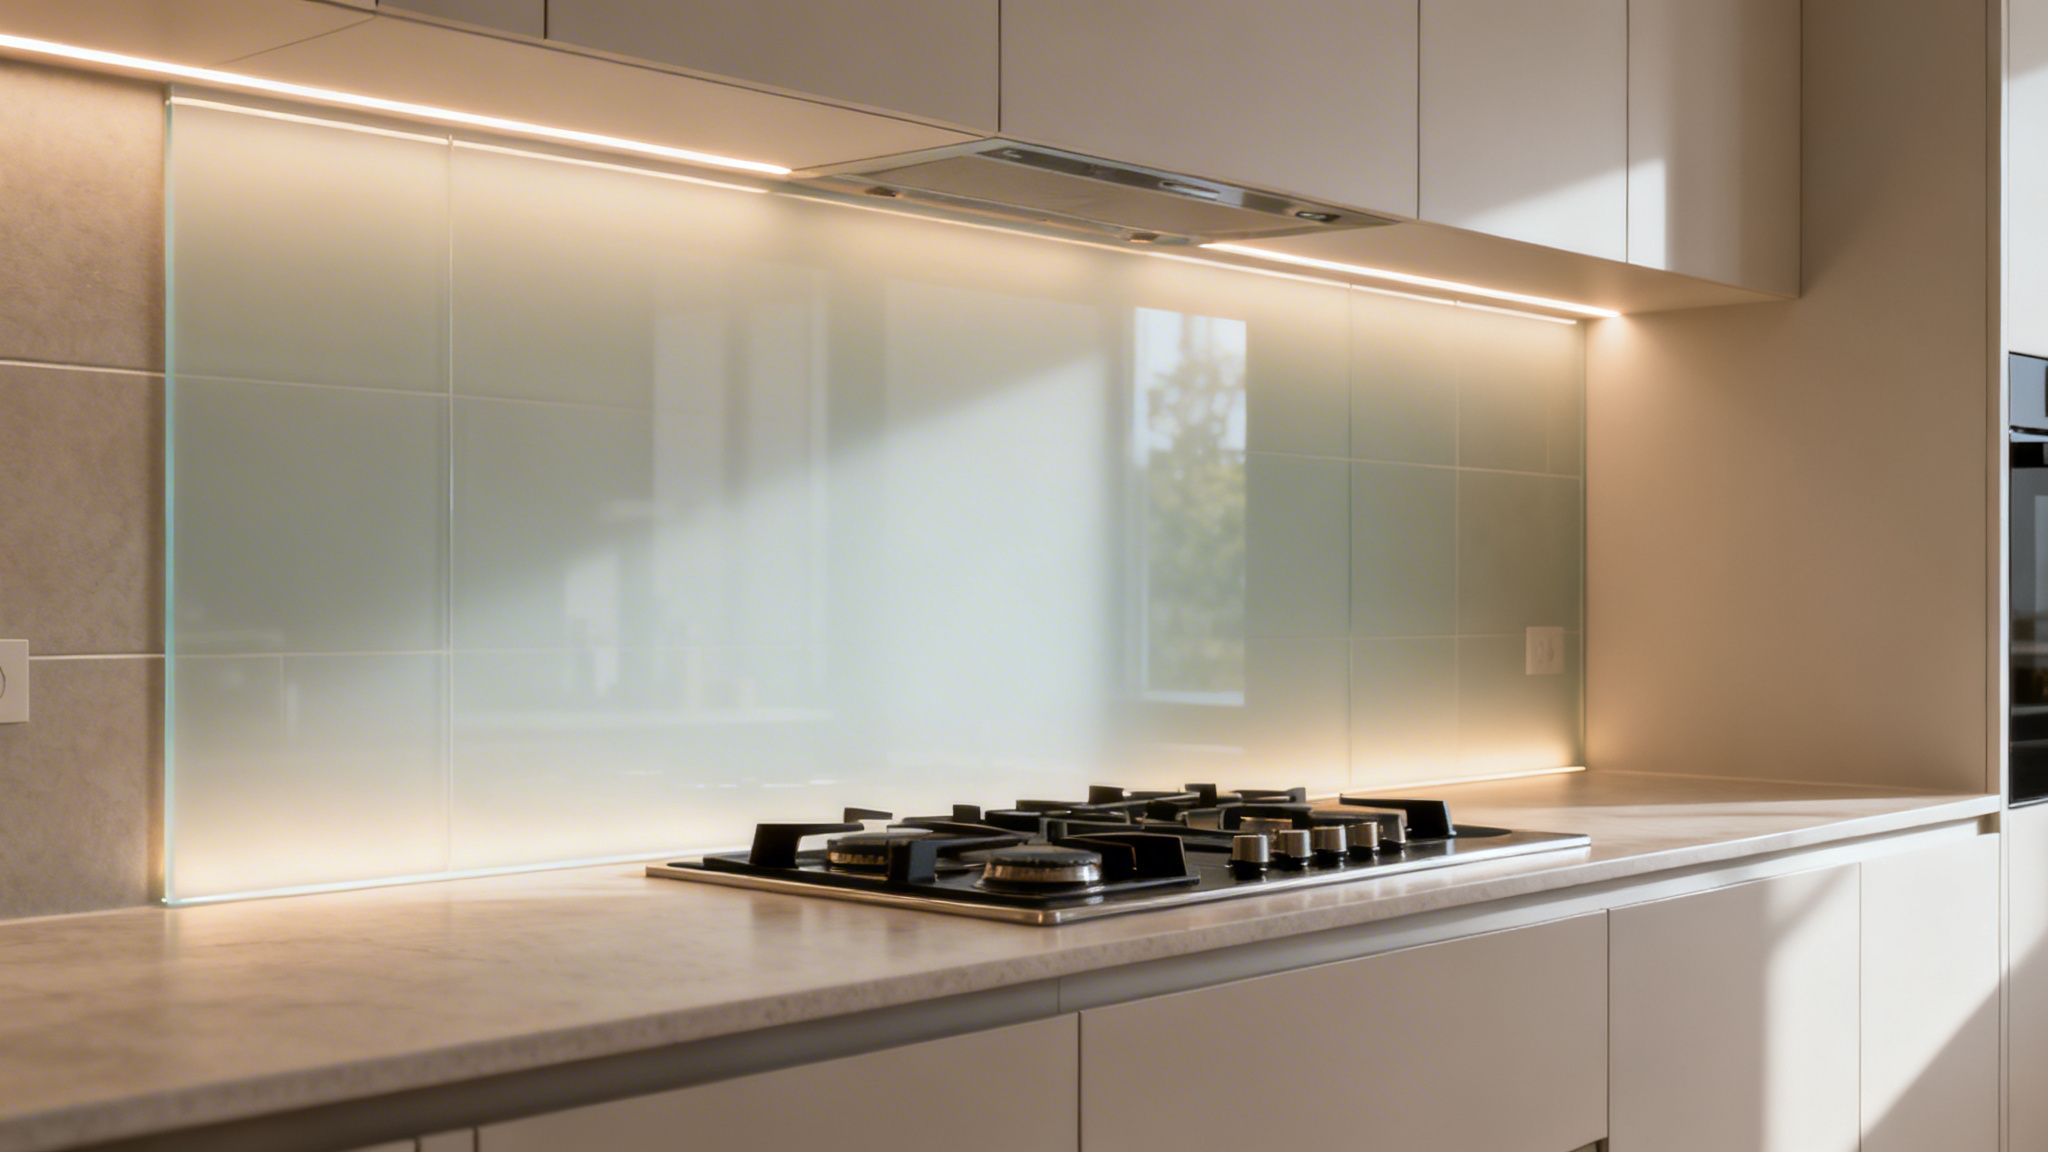
The main benefit of integrated splashback lighting is its ability to eliminate shadows cast by overhead fixtures, providing clear, direct light onto your food preparation areas. It also serves as a beautiful ambient light source when the main kitchen lights are off. To truly make your integrated splashback lighting shine, consider pairing it with complementary and inspiring tile backsplash ideas for your dream kitchen. For a successful installation, follow these tips:
Expert Insight: Proper installation is essential to prevent moisture from damaging the electronics. A licensed electrician from DLG Electrical can ensure all components are sealed correctly, the power supply is safely housed, and the entire system complies with Australian electrical safety standards for wet areas.
Track lighting systems offer a blend of industrial chic and functional flexibility, making them a standout choice among kitchen lighting ideas in Australia. These systems feature individual light fixtures, or “heads,” mounted on a continuous track, allowing you to slide and pivot them to direct light exactly where it is needed. This adaptability is perfect for kitchens that serve multiple purposes, from a busy food preparation zone to a casual entertaining space.
Their versatility is on full display in contemporary Brisbane kitchens. For instance, recent renovations in Windsor have featured sleek, black track systems with warm LED spots, creating a modern aesthetic while providing focused task lighting over islands. Similarly, open-plan homes in North Brisbane are using track lighting to bridge the kitchen and living areas, using adjustable heads to highlight architectural details or artwork on one side and functional benchtops on the other.
The main advantage of track lighting is its supreme adjustability. You can easily reconfigure your lighting without needing an electrician every time your kitchen layout changes slightly. Modern LED track heads are also highly energy-efficient and come in various styles to suit any decor. For a successful installation, follow these guidelines:
Expert Insight: When planning a track lighting installation, it’s crucial to select a system with compatible heads and drivers. A professional electrician can help you choose a high-quality system that avoids compatibility issues and ensure it is installed safely, especially in a kitchen environment. The team at DLG Electrical can advise on the best track lighting solutions for your specific kitchen design and ensure all wiring is compliant and safe.
Connected lighting systems are rapidly becoming a standard feature in Australian kitchens, offering control via smartphone apps, voice assistants like Alexa and Google Home, or automated schedules. This technology allows homeowners to adjust brightness, colour temperature, and on/off timing with unparalleled convenience. Integrating kitchen lighting into a broader smart home ecosystem not only adds a ‘wow’ factor but also provides significant gains in energy management and daily functionality.
This form of intelligent lighting is a standout amongst modern kitchen lighting ideas in Australia. In contemporary Brisbane homes, particularly in suburbs like Windsor and Grange, systems from Philips Hue or LIFX are being used to create dynamic environments. For instance, a homeowner can instantly switch from a bright, cool-toned light for focused cooking to a warm, dim setting for entertaining guests, all with a simple voice command or tap on their phone.
The main advantage of smart lighting is its adaptability and convenience. You can program ‘scenes’ for specific activities, such as a “Morning” scene that gradually brightens the lights or an “Entertaining” scene that shifts to vibrant colours. For successful integration, consider these practical tips:
Expert Insight: While smart bulbs are a great starting point, a fully integrated system with smart switches and hardwired fixtures provides the most reliable performance. A licensed electrician can help design and install a robust smart lighting network that avoids connectivity issues and is fully compliant with Australian electrical standards. To understand the various fixture options available, our guide on downlight types can provide valuable context for your smart home setup.
Harnessing natural light is one of the most effective and uplifting kitchen lighting ideas Australia has to offer, and skylights are the perfect tool for the job. By strategically installing roof windows, you can flood your kitchen with daylight, drastically reducing the need for artificial lighting during the day. In a sun-drenched climate like Queensland’s, this not only leads to significant energy savings but also enhances wellbeing by connecting your indoor space with the outdoors.
This approach is particularly impactful in homes where conventional windows are limited. For example, many contemporary homes in North Brisbane use skylights to illuminate central kitchen areas within deep, open-plan layouts that would otherwise be dark. Similarly, recent renovation projects in Grange and Windsor have integrated skylights with automated blinds, allowing homeowners to enjoy bright, natural light without the intense summer heat, creating a bright and comfortable environment year-round.
The primary benefit of skylights is the infusion of high-quality, full-spectrum natural light, which makes colours appear truer and the space feel larger and more inviting. It’s a sustainable solution that lowers electricity consumption while boosting mood and productivity. For successful implementation, consider these placement tips:
Expert Insight: Integrating skylights requires careful planning to avoid structural issues and ensure weatherproofing. A professional consultation can help determine the optimal size and placement for your roof structure and kitchen layout. DLG Electrical works alongside builders and roofers to coordinate the electrical components, such as wiring for automated blinds, ensuring a seamless and compliant installation from start to finish.
Cove lighting is a sophisticated technique that uses indirect light to create a soft, uniform glow. Installed within architectural details like ceiling recesses, crown moulding, or above upper cabinets, it bounces light off surfaces to provide gentle ambient illumination. This method adds a layer of visual interest and luxury, making a space feel larger and more defined without the direct glare of exposed fixtures.
This approach is becoming a hallmark of high-end kitchen lighting ideas in Australia, particularly in new builds and renovations aiming for a polished, architectural feel. In modern open-plan homes across North Brisbane, cove lighting is used to subtly separate the kitchen zone from living areas. Similarly, character home renovations in suburbs like Grange and Windsor are using it to accent high ceilings and original moulding, blending classic architecture with modern lighting principles.
The primary appeal of cove lighting is its ability to create a comfortable, high-end atmosphere. It eliminates harsh shadows and provides a pleasing background light that complements other lighting layers. While it works beautifully on its own for relaxed evenings, its main role is to support your overall scheme. For comprehensive insights into harnessing daylight, which cove lighting can beautifully supplement after sunset, consider reading this guide on Maximising Natural Light in Home Design.
Expert Insight: The success of cove lighting hinges on clean installation and proper electrical planning. A professional electrician from DLG Electrical can advise on the best type of LED strip and driver for your application, conceal all wiring, and ensure the final result is both stunning and compliant with Australian standards.
Rather than being a single fixture, layered lighting is a comprehensive design approach and the gold standard for creating a truly functional and atmospheric kitchen. It involves combining the three primary types of lighting-ambient, task, and accent-to build a versatile and visually appealing space. This method is fundamental to professional kitchen lighting ideas in Australia, providing separate control for different activities and moods.
This approach maximises the flexibility essential for modern open-plan living. Award-winning Brisbane kitchens frequently combine LED downlights for ambient light, under-cabinet strips for task lighting, and pendants over an island for accent and task purposes. In recent Grange and Windsor renovations, we’ve implemented complete layered schemes where homeowners can switch from bright, functional food prep lighting to a soft, moody setting for evening entertaining with the flick of a few switches.
The main benefit of a layered lighting plan is ultimate control. It ensures your kitchen is perfectly lit for any occasion, from cooking and cleaning to homework and hosting guests. By separating light sources, you eliminate harsh shadows and create depth and interest. To achieve a successful layered design, follow these tips:
Expert Insight: A well-executed layered lighting design requires careful planning of circuits and switch placement to be intuitive and compliant. The team at DLG Electrical can help design a multi-zone system that is both easy to use and meets all Australian electrical safety standards, ensuring each layer works perfectly on its own and in combination with the others.
Statement lighting fixtures are bold, decorative pieces that serve as a kitchen’s focal point, combining functionality with artistic expression. Far more than just a light source, these fixtures are a design statement that can elevate an ordinary kitchen into a stylish, personalised space. This approach is a popular feature in contemporary kitchen lighting ideas across Australia, with options ranging from sculptural pendant clusters to designer chandeliers adapted for kitchen environments.
This trend is particularly visible in North Brisbane renovations, where they are used to define zones in open-plan living. For example, many contemporary kitchens in Grange and Windsor feature artistic brass or black metal fixtures suspended over an island bench. This not only provides focused task lighting but also acts as a visual anchor, drawing the eye and separating the kitchen preparation area from the adjoining dining or living space with a touch of drama and sophistication.
The main benefit of a statement fixture is its dual role as both a functional light and a piece of art that reflects your personal style. It can set the entire design tone for the kitchen. For a successful installation, focus on proportion and integration:
Expert Insight: Heavy or complex statement fixtures require secure mounting and careful electrical work to ensure they are safely supported and correctly wired. A professional electrician can assess the ceiling structure, install necessary bracing, and manage the wiring to guarantee a safe and flawless installation, especially for high-end designer pieces.
| Option | 🔄 Implementation Complexity | ⚡ Resources & Cost | 📊 Expected Outcomes / Impact | ⭐ Ideal Use Cases | 💡 Key Advantages / Tips |
|---|---|---|---|---|---|
| LED Downlights with Dimmer Controls | Moderate — recessed installs, electrician, dimmer compatibility checks | Moderate initial cost; very low running & maintenance costs | Even ambient lighting, large energy & lifespan gains | General ambient lighting in most kitchens, renovations | Space 1.2–1.5 m apart; use warm 2700K; ensure IC rating |
| Under-Cabinet Task Lighting | Low–Moderate — easy retrofit but needs concealed wiring for best result | Low–Moderate cost; LED strips and channels inexpensive | Shadow-free benchtops, improved safety and task efficiency | Benchtops, prep zones, retrofits | Install 20–30 cm from cabinet edge; use aluminium channels; separate switch |
| Pendant Lights Over Kitchen Islands | Moderate — ceiling mounts, height and sometimes structural checks | Variable cost (low to high) depending on design and finishes | Focused island lighting plus strong decorative impact | Islands, breakfast bars, open-plan focal zones | Hang 65–75 cm above benchtop; 1 pendant per 60–90 cm; use shades to cut glare |
| Integrated Splashback Lighting | High — must be planned into splashback build, complex wiring and waterproofing | High initial cost; professional installation required | Ambient accenting of splashback, strong design feature, hidden wiring | New builds and high‑end renovations, entertaining kitchens | Use IP‑rated strips, plan during design, add diffusers to reduce glare |
| Track Lighting Systems | Moderate — track mounting and professional wiring; adjustable heads simplify changes | Moderate cost; flexible reconfiguration without rewiring | Highly flexible directional lighting; feature highlighting | Highlighting feature walls, adjustable open‑plan kitchens | Run parallel to walls, use 3–5 spots per track, angle 45–60° for best coverage |
| Smart Lighting with Voice Control | Moderate — network integration, hub/devices, software setup | Moderate–High initial cost; potential long‑term energy savings | Remote/voice control, automation, scenes, improved accessibility | Connected homes, entertaining setups, accessibility needs | Ensure robust Wi‑Fi, choose compatible ecosystem, enable security updates |
| Natural Light Optimization with Skylights | High — structural roof work, flashing, possible planning permits | High upfront cost; reduces daytime electricity use | Significant daylighting, wellbeing benefits, possible ventilation | New builds and major renovations, central window‑poor kitchens | North‑facing placement in Australia, add blinds/shading, use triple glazing |
| Ambient Cove Lighting | Moderate–High — requires concealed mounting and design integration | Moderate–High cost for quality diffusers and installation | Soft ambient background, spatial definition, upscale finish | High‑end renovations, tall ceilings, open‑plan living | Mount 15–30 cm below ceiling, warm 2700K, fit dimmers for mood control |
| Layered Lighting Design | High — coordinated planning, multi‑circuit wiring and controls | High overall cost but efficient via zoned use | Complete functional coverage, flexible moods, energy savings via zoning | Whole‑kitchen design, best‑practice renovations, open‑plan homes | Plan all layers early, separate circuits and dimmers, test at different times |
| Statement Lighting Fixtures | Moderate — may need structural support and careful placement | High cost for designer pieces; variable installation needs | Strong visual focal point; elevates design but limited as sole light source | Entertaining kitchens, open‑plan spaces, design‑forward renovations | Scale to room and ceiling height, ensure supplementary task lighting |
We’ve explored a diverse range of kitchen lighting ideas Australia has to offer, from the practical brilliance of LED downlights to the dramatic flair of a statement fixture. Your journey to a perfectly illuminated kitchen is not about picking a single light but about creating a cohesive, functional, and beautiful system. The real secret lies in understanding and applying the principles of layered lighting, a concept we’ve returned to throughout this guide.
By thoughtfully combining ambient, task, and accent lighting, you transform a simple room into a dynamic and inviting space. Imagine your kitchen where bright, focused light makes meal preparation safer and easier, while soft, ambient light creates a warm atmosphere for a family breakfast. Then, with the flick of a switch or a voice command, you can dim the lights and highlight architectural features for an evening of entertaining. This level of control and functionality is what elevates a good kitchen into a truly great one.
To summarise, the most impactful approach involves a multi-faceted strategy. It’s about seeing your kitchen lighting not as an afterthought but as a fundamental component of its design and usability.
Here are the most important points to remember:
Expert Insight: The difference between a poorly lit kitchen and a brilliantly lit one often comes down to planning. Sketching out your kitchen layout and marking where key activities happen – chopping, washing, cooking, socialising – is the first step. This “activity map” will directly inform where your task, ambient, and accent lighting should be placed for maximum effect.
Ultimately, investing time and resources into a well-designed lighting scheme is one of the most rewarding upgrades you can make. It impacts not just the look of your kitchen but its safety, your efficiency, and the overall feel of your home. A great lighting plan breathes life into the heart of your home, making it a place where memories are made, meals are shared, and daily routines become more enjoyable. The right combination of fixtures and placements will ensure your kitchen is a beacon of style and practicality for years to come.
Ready to bring these kitchen lighting ideas to life in your Australian home? For a safe, compliant, and beautifully executed installation, trust the experts at DLG Electrical. We specialise in designing and implementing customised lighting solutions for Brisbane homeowners, ensuring your project meets all safety standards and exceeds your expectations. Contact DLG Electrical today for a professional consultation and quote.

Master Electrician with over 30 years of experience. Founded DLG Electrical in 2005 after international project work including electrical installations at Stamford Bridge Stadium, London(Home of Chelsea FC).

Local Electricians that can fix all Electric Hot water Systems.
Motion sensor lights are a versatile addition to any home, offering nu
