83 Jean St, Grange QLD 4051
Mon-Fri 07:30 AM - 04:00 PM - Sat - 8:00 - 12 - Sunday Closed
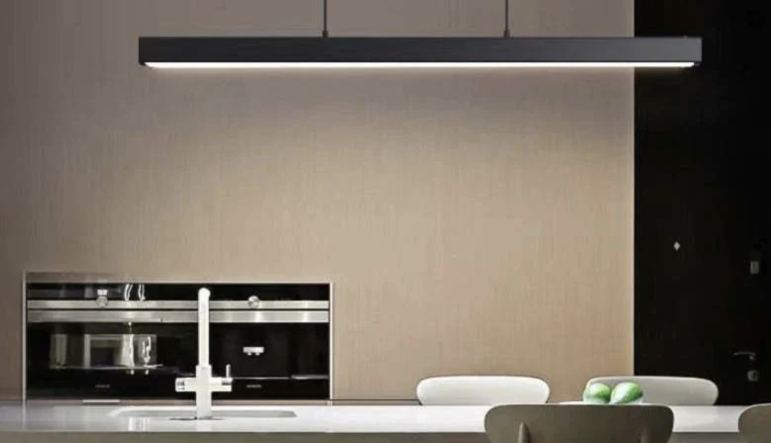
Dinner prep usually exposes bad kitchen lighting fast.
You step up to the bench, switch on the ceiling light, and still end up working in your own shadow. The chopping board is dim near the splashback. The cooktop looks brighter than the prep zone. Gloss cabinets bounce glare back at you. At night, a kitchen that looked sharp during the renovation suddenly feels awkward to use.
That problem is common in Brisbane homes. A single central fitting rarely lights the bench where people slice, clean, season, plate, and read recipes. Good modern kitchen bench lighting fixes that by putting light on the task, not just into the room.
Bench lighting also needs to suit local conditions. Queensland humidity can shorten the life of poor-quality fittings. Many kitchens here do not have islands, so advice built around pendant lights misses the mark. And once wiring, switching, dimming, or new connections are involved, the installation has to comply with AS/NZS 3000.
A well-planned setup does three jobs at once. It improves visibility, reduces shadows, and makes the kitchen feel finished after dark.
A lot of kitchens look bright from the doorway but work poorly at the bench.
The reason is simple. The main ceiling light throws light broadly into the room, but your body blocks it right where you stand. The further the bench sits under overhead cupboards, the worse that shadow gets. That is why a kitchen can feel fine for walking through and still be frustrating for prep work.
In older Brisbane homes, this often shows up in galley kitchens and U-shaped layouts. In newer builds, it appears when the lighting plan focused on open-plan ambience and not on task zones. Either way, the result is the same. The bench is the most-used surface in the room, yet it gets the least useful light.
Proper task lighting makes everyday jobs easier.
A kitchen does not need more fittings everywhere. It needs the right fittings in the right place.
Modern kitchen bench lighting is not one product. It is a combination of fixture choice, beam control, placement, switching, and compliance. A sleek strip under a cabinet can outperform a stronger ceiling light if it is positioned correctly. A downlight can be excellent or useless depending on whether it lands on the benchtop or in the walkway.
The best results come from treating the kitchen bench as a dedicated work zone. Once you do that, every choice gets simpler. You stop asking what looks trendy and start asking what lights the cutting area, the sink run, and the appliance bench without glare.
The right fixture depends on what sits above the bench, how visible you want the fitting to be, and how much control you want over the light.
Some homeowners want the light source hidden. Others want a clean architectural look with almost nothing mounted under cabinets. Some need strong task lighting over one main prep area. Others want soft, continuous illumination along the whole run.
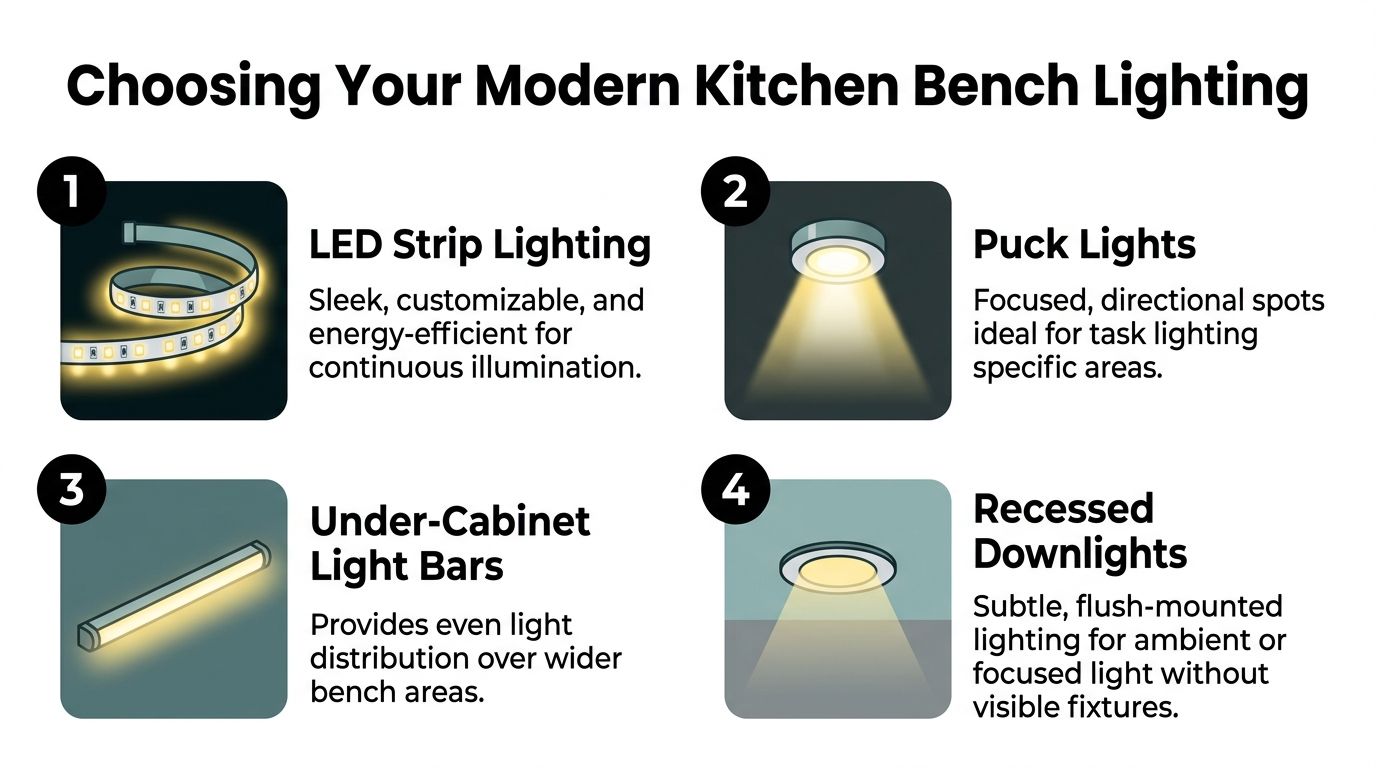
LED strip lighting is usually the strongest option for under-cabinet bench lighting because it gives continuous light, not isolated pools.
That matters on a kitchen bench. You want even coverage across chopping areas, small appliances, and the sink side of the bench, not bright circles with dark gaps between them. When the strip is housed in an aluminium profile with a diffuser, the finish looks neater and the light feels softer on the eyes.
Queensland conditions matter here. Generic strip products often look fine on the shelf but fail early in humid kitchens. A more reliable choice is IP65-rated smart, dimmable LED strip lighting, which is described as suitable for humidity levels up to 80% and aligned with AS 3000:2018 in this guidance on kitchen lighting mistakes from Language of Light. The same source notes that 42% of Australian homeowners are prioritising energy-efficient task lighting and that using a diffuser can improve CRI by up to 30%, which helps food and surfaces look more accurate under the light.
Recessed downlights work best when there is no cabinetry above the bench, or when you want the ceiling plane to stay clean.
They are not automatically good task lights. Their success depends on placement and beam angle, not just wattage. In kitchens with open shelves, window runs, or bench spaces that sit away from overhead cupboards, a well-positioned downlight can put useful light exactly where needed.
Downlights suit modern kitchens where the owner wants minimal visible hardware. They also help when under-cabinet lighting is impossible due to design constraints.
If you are comparing fixture styles and want broader inspiration before narrowing down the practical choice, these Modern kitchen lighting ideas are useful as a design reference. The key is filtering any visual idea through function, beam control, and local compliance.
Puck lights are small, discrete fittings that create focused pools of light.
They can work well for short bench sections, coffee stations, appliance garages, or feature areas where a full strip is unnecessary. They are also handy when cabinetry design makes a linear strip awkward.
Their weakness is continuity. A series of pucks can leave visible gaps between lit areas, especially on long benches. That may be acceptable in a butler’s pantry or a small prep nook, but it is less satisfying on a main family kitchen bench.
Light bars sit somewhere between strips and pucks.
They usually come as slim, rigid fixtures that throw a more even spread than pucks but are simpler to install than custom-profile strip systems. For some kitchens, they are a very practical middle ground. They suit homeowners who want a clean result without specifying channels, tape, drivers, and diffuser combinations piece by piece.
The downside is visual bulk. Even slim bars are more visible than a concealed strip.
| Kitchen Bench Lighting Fixture Comparison | Best For | Light Quality | Installation Complexity |
|---|---|---|---|
| LED Strip Lighting | Long benches, seamless under-cabinet lighting | Continuous, even, soft with diffuser | Moderate to high |
| Puck Lights | Small task zones, short cabinet runs | Focused pools, can create gaps | Moderate |
| Under-Cabinet Light Bars | Wider bench coverage with simpler hardware | Even spread, more visible fixture | Moderate |
| Recessed Downlights | Open benches without upper cabinets | Focused when aimed and spaced well | Moderate to high |
A fitting can be technically good and still be wrong for the kitchen.
Check these details before buying:
For a broader look at efficient fitting choices in homes, the article on the benefits of LED lighting is worth reading alongside your kitchen plan.
Layout is where most kitchen lighting projects succeed or fail.
A premium fitting installed in the wrong location still gives poor light. This is especially true over benches. If the fitting is too far back, too centred in the room, or too wide in beam spread, the light misses the work area and lands where it is not needed.
The bench is the target.
That sounds obvious, but many layouts still line lights up with the centre of the kitchen or the centre of the walkway. That gives symmetrical ceiling spacing, but not useful task lighting. In practice, the user stands at the bench edge, so the light should favour that zone.
For Queensland homes, this matters even more because many kitchens are bench-focused rather than island-focused. According to the cited guidance, 68% of Queensland kitchens don’t have an island, which is why island-heavy lighting advice misses so many local kitchens. For the common bench-only layout, the recommended recessed downlight position is 15 to 30cm from the wall, centred over the edge of the benchtop rather than the middle of the walkway, with a 40° beam angle at standard 2.4m ceilings. That setup is described as improving usable light on the bench by over 20% compared with wider beams that push light onto the floor in this reference on kitchen lighting placement at Naperville Roofing and Construction.
That single point explains a lot of disappointing kitchens. The problem is often not brightness. It is geometry.
Under-cabinet lighting should sit toward the front edge of the cabinet underside in most kitchens, not hard against the splashback.
Mounting it too far back creates glare on glossy splashbacks and leaves your hands casting shadows onto the work area. A forward position projects light where the task happens and keeps reflections more controlled.
If a strip is lighting the splashback better than the chopping board, it is too far back.
Open bench areas need a different approach because there is no cabinet to hide a fixture under.
A downlight layout should respond to each bench run, not just the room shape. In an L-shaped kitchen, one leg may need a stronger task focus than the other. The sink run may benefit from separate control. The appliance bench may need less direct output than the prep bench.
Mark the active work zones
Identify where food prep, washing, and small-appliance use happen.
Project the bench edge upward
On the ceiling plan, draw a line that matches the front working edge of the bench below.
Place the fitting over that line
Do not centre it in the traffic path.
Choose beam spread to suit ceiling height
In typical Brisbane ceiling heights, tighter control usually gives better bench light than a wide flood.
For a more visual planning process, digital room mock-ups can help test how finishes and fixture positions work together. A tool focused on lighting harmonization can be useful for concept review before the electrical set-out is finalised.
Glare is one of the least understood parts of modern kitchen bench lighting.
People often assume a brighter fitting is better. It is not. A badly positioned light can feel harsher while doing a worse job. Glare usually comes from one of four causes:
The fix is usually a combination of position, shielding, and beam choice. An experienced installer earns their keep here. On site, small changes in offset can make a noticeable difference.
Not every kitchen needs the same arrangement.
A galley kitchen benefits from disciplined linear lighting. Under-cabinet strips often perform best because the work zone is long and narrow.
The priority is keeping corner transitions clean. Poor layout can create a bright-dark-bright rhythm that feels broken when you move around the bench.
One leg usually does more work than the other. Treat the prep leg as the primary task zone and keep the secondary run slightly softer if needed.
Recessed downlights or carefully placed surface fittings become more important here. The ceiling plan has to do the work the cabinetry would normally help with.
If you are comparing downlight options for these layouts, this guide on choosing a downlight for ceiling helps frame the trim, beam, and application decisions.
Kitchen bench lighting is not just a design choice. It is electrical work in one of the hardest-working parts of the home.
Benches sit near water, heat, steam, cleaning products, and constant use. Add dimmers, low-voltage drivers, smart controls, and retrofitted cabinetry, and the job becomes more technical than many people expect. A neat-looking finish means very little if the wiring method is poor or the installation cannot be serviced safely later.
These three approaches are not equal.
Battery products are fine for temporary use, inside cupboards, or very light-duty applications. They are not a serious long-term solution for a main kitchen bench. Output drops, charging becomes a nuisance, and the result rarely feels integrated.
Plug-in fittings can suit rentals or simple upgrades where no permanent electrical alteration is planned. They are quick to install, but visible cords and power point dependence often undermine the finish.
Hardwired systems are the proper built-in option. They give a cleaner result, more reliable switching, and better integration with dimmers and smart controls. They also support a more permanent renovation standard.
Most modern LED bench systems rely on a driver or power supply.
That component cannot be treated as an afterthought. It needs to be matched to the load, installed in a suitable location, protected from damage, and left accessible for future maintenance. Hiding a driver behind permanently fixed cabinetry may look tidy on day one, but it creates a headache when fault-finding or replacement is needed later.
A good installation keeps serviceability in mind from the start.
The neatest kitchen lighting jobs are usually the ones where the rough-in was thought through early, not the ones patched together at the end.
In Queensland, electrical work connected to the home’s wiring must comply with AS/NZS 3000, often referred to as the Wiring Rules.
That matters in kitchens because the space includes moisture, conductive surfaces, fixed appliances, and high daily use. Compliance is not just about passing inspection. It affects safety, fault protection, cable routing, isolation, correct connection methods, and whether the finished work can be relied on over time.
This is also why licensed electrical work matters. Adding a new switched circuit, altering existing wiring, connecting drivers to mains supply, installing new dimmers, or extending fixed lighting points is not a DIY task.
Poor kitchen lighting installations tend to fail in predictable ways.
For homeowners, landlords, and renovators, the paperwork side matters too. If electrical work is carried out, understanding the role of a certificate of compliance helps you know what to expect from a properly completed job.
The cost of modern kitchen bench lighting depends less on the fixture alone and more on how much work is needed to install it properly.
Two kitchens can use similar fittings and end up with very different quotes. The difference usually comes down to access, existing wiring, switch changes, cabinet construction, and whether the lighting is being added during a renovation or retrofitted after the kitchen is already finished.
Most bench lighting projects include three broad cost areas.
This is the visible part. LED strips, channels, diffusers, downlights, puck lights, dimmers, and switch gear all sit in this category. Premium products usually cost more because the finish is better, the output is more consistent, and compatibility problems are less common.
This covers the less glamorous but necessary items. Cable, connectors, drivers, mounting hardware, cut-out accessories, and any protective components sit here. On strip lighting jobs, the driver choice and mounting method can affect both reliability and labour.
Labour often becomes the biggest variable. A straightforward installation in an accessible kitchen is one thing. Retrofitting lighting into existing cabinetry and ceilings without visible damage is another.
A simple job is usually one where the kitchen already has a practical power source nearby, cabinetry allows concealed mounting, and switching changes are minimal.
A more involved job tends to include one or more of these:
The layout also matters. A single short under-cabinet run is much simpler than multiple bench zones with separate controls.
For planning purposes, the timeline is often shaped by access and coordination, not by the fitting itself.
A clean installation in an already-prepared kitchen can move quickly. A retrofit can take longer because the electrician has to work around cabinetry, splashbacks, paint finishes, and occupied living spaces. If a cabinetmaker, stonemason, or painter is also involved, the sequence matters.
The fastest quote is not always the cheapest outcome. If an installer has not allowed time for access, driver placement, and testing, the shortcuts usually show up later.
The best way to budget is to decide early whether you want a simple functional upgrade or a fully integrated finish. That one choice affects fixtures, labour, timeline, and the overall result.
Some parts of a kitchen lighting project suit a hands-on homeowner. Some do not.
The useful line is not confidence. It is whether the task involves fixed electrical work, compliance, and safety-critical decisions.
Plenty of pre-installation work is homeowner-friendly.
You can sketch the bench zones, collect reference photos, choose finishes, compare fixture styles, and decide how you want the kitchen to feel at night. You can also install some battery-operated products or certain plug-in accessories that do not alter the home’s fixed wiring.
These tasks help the project. They also make the conversation with a licensed electrician far more productive.
Once the job involves mains-connected wiring, the answer is simple. Bring in a professional.
That includes:
The legal side matters, but the practical side matters just as much. A licensed electrician will think about load, switching logic, future access, fault finding, and how the lighting interacts with the rest of the kitchen electrical layout.
A short visual overview can help if you are still weighing up the complexity involved:
If the task changes the building’s electrical system, it is not DIY.
If the task only involves planning, product selection, or a standalone non-hardwired product, it may be suitable to handle yourself. That split keeps the project safe and usually leads to a better finish anyway. The best kitchen lighting jobs come from homeowners making strong design decisions and licensed electricians handling the electrical work behind them.
Not always.
It should feel consistent, but task lighting often needs to be cleaner and more precise than ambient lighting. The aim is a kitchen that works well without looking patchy. Matching by function is usually more important than matching every fitting type.
They can be, especially if you use the kitchen heavily at different times of day.
Dimming is often the most useful feature. Bright task light is great for prep and cleaning, but softer light is usually better later in the evening. The important part is making sure the fittings, driver, and control method are all compatible before installation.
Sometimes yes.
Downlights can do a good job in open bench areas, but cabinets change everything. Once the overhead cupboard starts blocking ceiling light, under-cabinet lighting usually becomes the better task-light source.
They buy fittings before planning the layout.
That leads to the wrong beam, the wrong mounting point, or a driver with nowhere sensible to go. Start with the bench zones and cabinet details, then choose the fitting.
Often yes.
Retrofit work is common, but the difficulty depends on access and how the kitchen is built. A site inspection usually reveals very quickly whether the job is straightforward or whether cabinetry and switching will need more involved work.
If you want practical advice on modern kitchen bench lighting, a compliant installation, or a clear quote for your Brisbane home, contact DLG Electrical. Their licensed team handles kitchen lighting upgrades with a focus on safe wiring, clean finishes, and solutions that work for Queensland homes.

Master Electrician with over 30 years of experience. Founded DLG Electrical in 2005 after international project work including electrical installations at Stamford Bridge Stadium, London(Home of Chelsea FC).

Local Electricians that can fix all Electric Hot water Systems.
Motion sensor lights are a versatile addition to any home, offering nu
